Purpose
To Instruction to help users with EAP Sensor Wireless Evaluation Kits users
Scope
- Set up
- Connecting to App
- App Features
Note: Instruction to cover both SNES-KIT-B-01 & SNES-KIT-B-01-U Evaluation Kits.
...
Description | Picture |
USB battery |
|
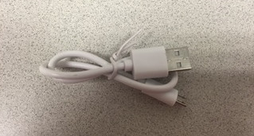
Micro-USB Cable |
|
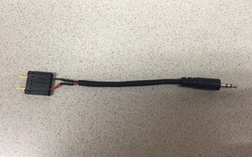
Sensor Cable |
|
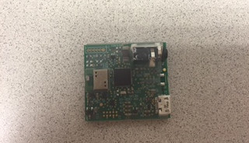
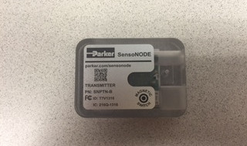
Transmitter |
|
|
|
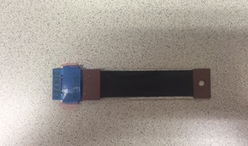
EAP Sensor |
|

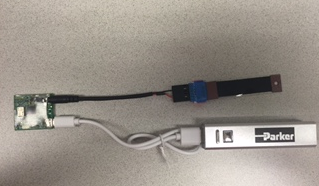
Kit Set Up
Connect USB battery to BLE transmitter using the micro USB cable
Make sure the battery is fully charged
Do not connect the battery to the transmitter while at charge
Connecting battery to transmitter while at charge introduces noise
- Connect the Sensor Cable to Transmitter
- Insert sensor cable audio jack into the audio input on the BLE transmitter
- Connect the sensor to the sensor cable
- Sensor Pin Outs are #2 & 5, meaning that the sensor cable pins should be connected to the pin #2 & 5 on the blue connector (See below picture)
- Turn on the battery
- Battery light is blue when charged and is red when charging is needed

Connecting to App
Download the "SCOUT Mobile" App from Apple Store
Search for "SCOUT Mobile by Parker"
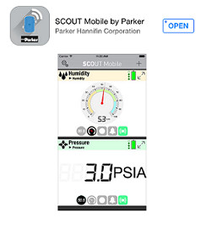
- or use following URL to download the App
https://itunes.apple.com/us/app/scout-mobile-by-parker/id854658474
Set up your kit and turn on the battery (See set up instruction above)
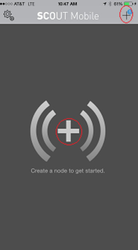
- Fire up the App
- Connect the BLE transmitter to the SensoNODE app using the (
 ) sign in the middle of screen or the + sign at the top-right corner
- Hit "+" to add sensor
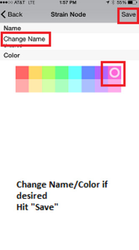
- Select the sensor you like to monitor
- Sensor identification is BLE radio serial number (See back of BLE Radio)
- Change the name or color ID of the sensor if desired
- Hit "Save"

App Features
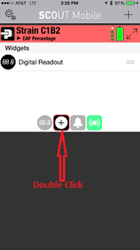
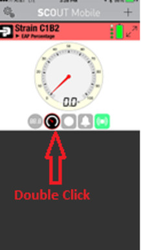
- Adding a widget
- Double Click on the Widget folder ( Square with + in the middle)
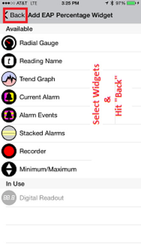
- Select the desired widgets
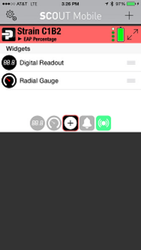
- Hit "Back" at the top-left corner. Now you see the list of selected Widgets
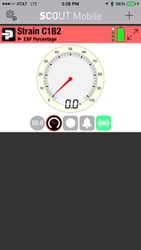
- Hit desired widgets to monitor sensor out put
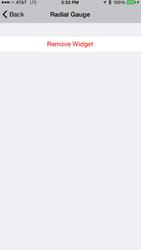
- Removing a Widget
- To remove a widget, double click on the widget icon
- Hit "Remove"
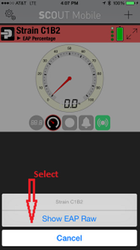
- Changing the read out from EAP Percentage to EAP Raw
- To change EAP sensor read out from Percentage to Raw hit "EAP Percentage"
- From the pop-up menu select "Show EAP Raw"
- To see EAP Raw count select the read out icon

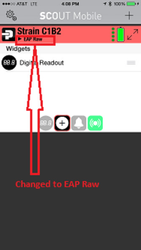
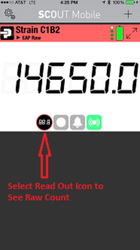
- Selected Widgets do not roll over from Percentage Mode to Raw Mode
- Desired widgets needs to be selected independently for each percentage and raw modes
- In raw mode, user get to see the count numbers.
- Calibration
- You may notice that connected sensors might be off by up to 5% before calibration
- This is because the Scout Mobile App default setting is for 50 mm sensors therefor user needs to calibrate the App if using a sensor of a different size.
- In some cases even a 50 mm sensor reading could be off by a few percent. User can use the same calibration process to increase accuracy of the sensor.
- The app has a default "Count Number" setting that needs to be changed for each sensor to improve accuracy
- Set the App to display count (EAP Raw). For how to access "Count Numbers" see previous section
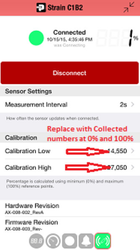
- To calibrate, collect the Count numbers at 0% and 100% strain. Record/note Note the Counts numbers when the sensor is relaxed for (0% and stretch the sensor 50 mm and record ) and also note the count number for at 100% elongation. These two numbers are min and max that needs to be replaced with App's default setting.
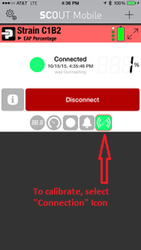
- For calibration highlight the "Connection" Icon with green color
- Hit the pro icon with letter i
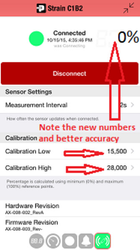
- Replace the calibration low and calibration high numbers with the numbers collected at 0% and 100% for the specific sensor you are calibrating.